Power Window Regulator Repair (and Troubleshooting Advice)
Is your power window acting up, making strange noises or getting stuck? The window regulator is likely the culprit. While repairs can seem daunting, understanding the signs of failure and following some DIY steps can save you money.
This article covers power window regulator troubleshooting tips and repair instructions so you can learn how to diagnose your power window issues and replace the regulator yourself.
Purpose of a Power Window Regulator
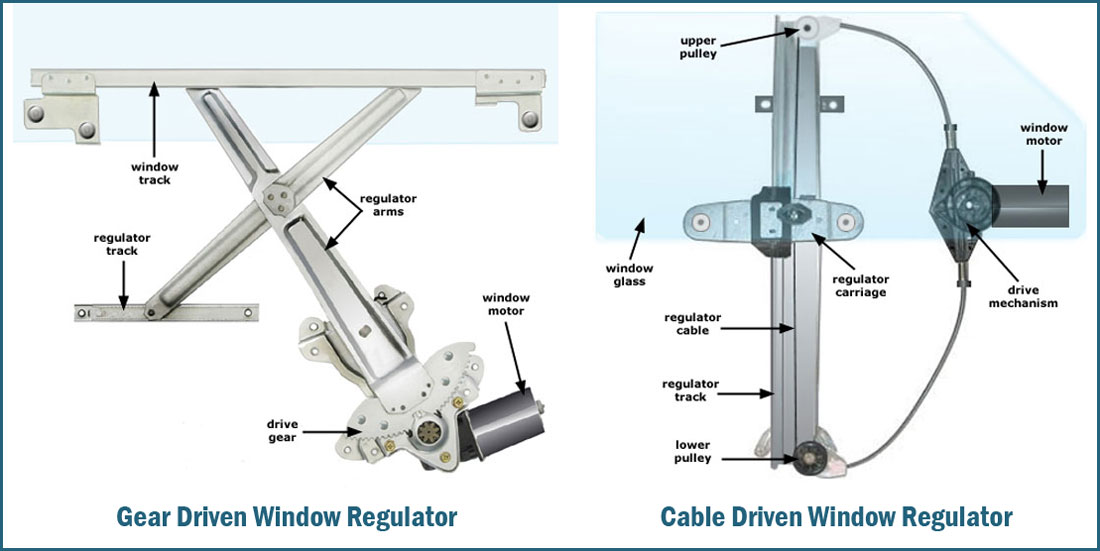
The power window regulator is responsible for the up and down motions of the windows of a vehicle. The basics of the power window regulator are the same as that of the older crank systems with the only difference being the drive the force provider which has become a motor instead of the driver’s or passenger’s hand.
The regulator consists of a “C” channel in which the window sits with a scissor-pulley system attached to it. In case of a window not moving at all, the possible problems related to it are only a few and are quite simple and easy to deal with. There is no rocket science involved in it.
Troubleshooting a Faulty Window Regulator

There are some simple and easy methods to assess the problem associated with it as well as several possibilities for a faulty power window which can be narrowed down one by one and to the power window regulator if no other component is the culprit.
The first order of business is to check the fuses in the fuse box. If the fuses are alright, then it’s time to look at any loose wiring on the fuse box and the switch panel.
Press the button and if you hear the humming sound of the motor but no movement of the windows, it means that your motor is just fine and it is more than likely that the culprit behind this problem is the power window regulator which needs some looking at.
Window Regulator Repair Process
Best places to order parts? See: 19 Best Online Auto Parts Stores
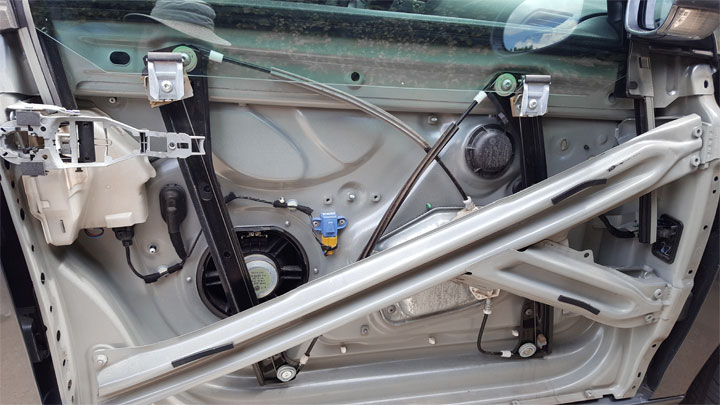
- The first thing to do is to take out the screw of the door handle and the arm rest which are holding the door. After unscrewing them, remove the door and the arm rest and take off the door cover.
- You’ll see a plastic sheet underneath it which is also called a weather shield to protect the wirings and the motor from water in case of rain, washing etc. Carefully disconnect all of the wire clips to before removing the door panel.
- Carefully peel off the plastic sheet without tearing it or ripping it apart since you’ll need to use it again to cover the entire assembly and the wiring after you’re done.
- Loosen all of the bolts and screws underneath and pull your window up with your hand right to the very top.
- Hold the window glass at the top with some strong tape or something similar to make sure that it doesn’t slip down.
- Loosen the bolts of the regulator and extend your arm inside the cavity of the door in which the regulator is installed and slowly pull it out. Make sure that you are careful in removing your regulator since the wire to the motor is still attached and you don’t want to break it or tear it unless you are ready for some expensive repairs.
- When your regulator is out, check it thoroughly and see if there are any obviously damaged parts which can be easily replaced. If not, then you might need to replace the entire regulator assembly.
- Make sure that your regulator assembly is the same as the one which was previously installed in your car’s door and can be fitted in easily again.
- Repeat the above procedure in reverse order after installing the regulator and carefully connect all of the wires to their respective places.

He’s known for his attention to detail and problem-solving skills and enjoys coming up with out-of-the box solutions when the situation requires it.
When he's not troubleshooting customers' cars, you'll most likely find him working on his current project ('96 Bronco) or cooking Italian food for his family.
- Replace the Engine or Replace the Car? (11 Factors to Consider) - Apr 11, 2024
- Plastic Piece Dragging Under Your Car? (What It Is and What To Do) - Mar 21, 2024
- Timing Belt vs Timing Chain (What’s the Difference?) - Feb 27, 2024