How to Find a Vacuum Leak (and Fix It Yourself)
Vacuum leaks are not only one of the most common issues vehicles can have, they are also one of the most aggravating due to the difficulty of locating the leak. They can leave even the best technicians scratching their heads at some point in their career.
Fortunately, there are a number of tricks of the trade that are utilized in shops across the country, once one or more vacuum leak symptoms are identified. Here’s a step-by-step on how to find that pesky vacuum leak.
How to Find a Vacuum Leak (Step-by-Step)
The following steps can be used to locate and isolate one or more of a particular engine’s vacuum leaks. However, it is imperative that each step below is followed in its entirety, and is conducted in the order specified.
See Also: Code P2279 (Air Intake Leak)
#1 – Familiarize Yourself With the Vacuum System
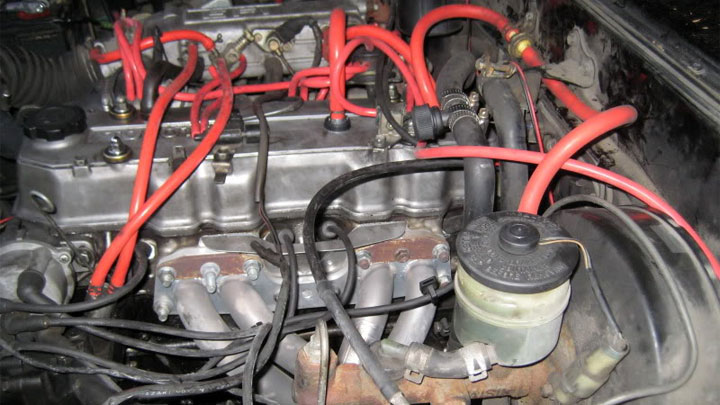
A vehicle’s vacuum system includes multiple components and a relative maze of hoses. Before beginning the diagnostic process, it is best to familiarize yourself with your vehicle’s vacuum system, and its routing.
Many vehicles feature an underhood diagram of the vacuum system as a whole, which can be used as a reference. If your vehicle does not feature a diagram of this nature, one can be located within a pertinent, model-specific service manual.
#2 – Verify Vacuum Leak
Since vacuum leaks are often mistaken as the source of various secondary issues, it is important to verify the existence of such an issue before beginning the diagnostic process. To accomplish this, hook a vacuum tester into your vehicle’s vacuum system.
This tester can then be actuated to draw a vacuum, without having to run a vehicle’s engine. A leak of any kind will cause this vacuum to bleed off, and dissipate quickly.
#3 – Perform a Visual Inspection
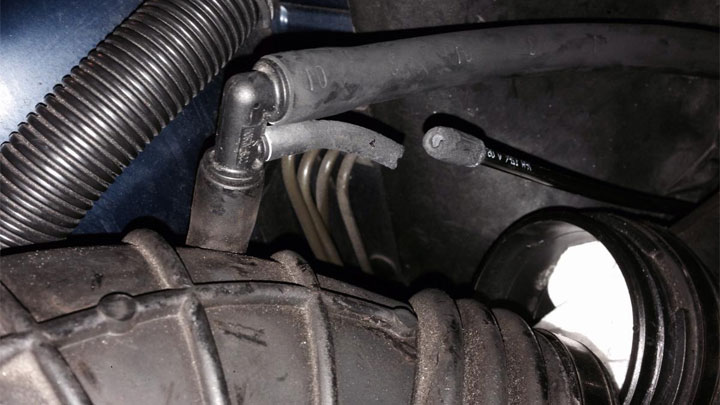
Carefully inspect your vehicle’s vacuum system, tracing each hose and component along the way by sight. Look for any signs of disconnected or damaged hoses, as well as any components which appear to have been compromised.
On relatively clean engines, it might also be possible to locate irregularities, or soot trails, around or near failed points within an engine’s intake or throttle body gaskets.
#4 – Listen For Unusual Noises
Next, fire up your vehicle’s engine, and listen for any abnormal hissing, squealing, or hissing noises.
Sounds of this nature are typically indicative of vacuum leaks and result from air being pulled through small cracks in a vacuum system’s hoses and gaskets.
#5 – Use a Propane Torch
If visible and audible inspections fail to reveal the source of your vehicle’s vacuum leak, try using a basic propane torch to hunt down leaks at their source.
Finding a vacuum leak with a propane torch is simple. Start by firing up your vehicle’s engine, and opening up the valve on your handheld propane torch. However, do not light the torch being used.
Next, simply wand the unlit propane torch over the engine’s vacuum system in its entirety, inch-by-inch. Upon traversing a leak, a change in engine RPM will become apparent.
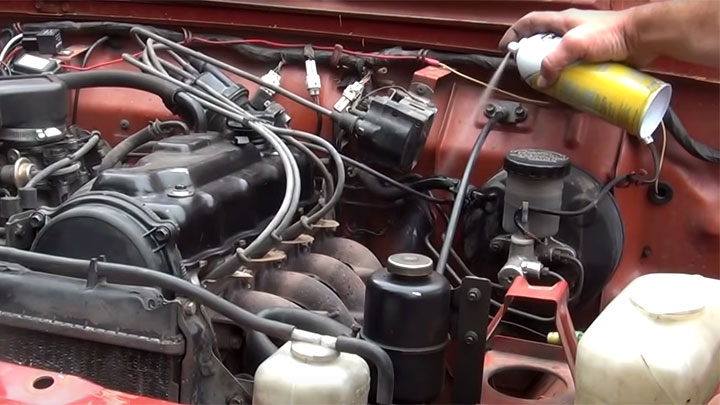
#6 – Use Carb Cleaner
Alternatively, carburetor cleaner can be used in a similar manner to propane, when attempting to locate the source of an engine’s vacuum leak.
Slowly trace every inch of an engine’s vacuum system, while carefully misting carburetor cleaner as you go. Like when using propane, a noticeable change in RPM will take place, when carb cleaner is sprayed across the source of a vacuum leak.
This is the direct result of carb cleaner being consumed for combustion.
#7 – Use a Smoke Machine
Though doing so requires the use of a specialty product, a smoke test can be used quite successfully to locate any offending vacuum leaks. This is typically accomplished with the use of an automotive smoke machine such as the AutoLine Pro, which is plumbed directly into a vehicle’s intake tract.
Once set up, a smoke machine of this type is activated, sending smoke throughout the entirety of a vehicle’s intake. In most cases, smoke will be seen wafting from the point of any potential vacuum leaks.
How to Fix a Vacuum Leak
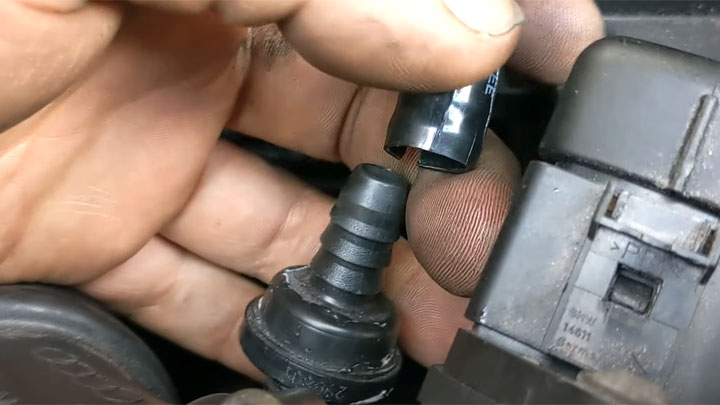
The method required to repair a particular vacuum leak is largely dependent upon the source of the leak itself. Simply put, not all leaks are the same and costs to repair a vacuum leak can be all over the place.
Some originate within an engine’s network of delicate vacuum hoses, while others might arise from a compromised intake gasket. Using this example, each type of leak would require a radically different method of repair.
However, as a general rule, the vast majority of vacuum leaks are repaired simply by replacing a compromised vacuum hose or heat-checked intake tube. Repairs of this type are extremely simple, taking only minutes to complete. In fact, the vast majority of vacuum leaks take far longer to diagnose, than they do to repair.
On the other end of the repair spectrum are age or damaged gaskets within the intake tract. This most notably includes an engine’s intake manifold gasket or throttle body gasket.
A leak at either point results in much the same issue and necessitates gasket replacement. A repair of this type is generally far more time-consuming, due to the amount of disassembly and reassembly required.
Additionally, the repair process utilized to repair a compromised intake gasket or throttle body gasket differs from one vehicle to the next. In any event, one should consult factory-specific service literature for their particular vehicle before tackling any such repair.

- P0480 Code (Symptoms, Causes, and How to Fix) - Apr 19, 2024
- Car Temperature Gauge Stopped Working? (Here’s Why) - Apr 15, 2024
- Ignition Coil vs Coil Pack (What’s the Difference?) - Apr 8, 2024