P0101 Code (Symptoms, Causes, and How to Fix)
A check engine light often sparks fear of major repairs and costs. But it’s simply awareness of an out-of-range specification. The light itself doesn’t mean certain doom – many triggers end up as easy, inexpensive fixes. Case in point, a P0101 code.
Despite knee-jerk assumptions, P0101 doesn’t always mean serious trouble or expense. Learn what code P0101 means, what causes it, and how to troubleshoot and fix it.
What Does Code P0101 Mean?
DTC P0101 is indicative of a mass air flow circuit/performance malfunction. This code is relaying the message that an out of parameter condition has been detected within the vehicle’s mass air flow circuit.
Simply put, your vehicle’s PCM (Powertrain Control Module) has detected an input from the circuit in question, that it has deemed to be incorrect or irrational.
In order to gain a greater sense of the message that code P0101 is attempting to convey, it is essential to understand what a mass air flow sensor is, and how it operates.
A vehicle’s mass air flow sensor measures the amount of air that is being introduced into the engine’s intake tract, at any given moment. This data is relayed to the engine’s PCM, where it is used to calculate the proper amount of fuel that should be delivered for efficient combustion.
When a P0101 diagnostic code is set, a vehicle’s PCM has determined that the data supplied by the engine’s mass air flow sensor falls outside of its typical operating range.
Related Trouble Codes: P0068, P0100, P0102, P0103
Symptoms of Code P0101
In many cases, additional symptoms will present themselves when a P0101 code has been set, outside of that relating to a newly illuminated check engine light. The most commonly experienced of these symptoms are as follows.
- Rough idle
- Stalling or hard starting
- Poor fuel economy
- Sluggish throttle response, especially within a certain RPM range.
- Dark color exhaust smoke
Causes of Code P0101
An active P0101 code can come as the end result of several underlying issues. The most common of these issues are as follows.
- Damaged or dirty MAF sensor
- Cracked intake boot
- Vacuum leaks
- MAF sensor-related wiring damage
- Need for PCM reprogramming
Is Code P0101 Serious?
The presence of a P0101 DTC warrants prompt diagnosis and repair. When a condition of this nature presents itself, driveability concerns can arise.
Starting or stalling issues can accompany such a condition, leaving you at risk of becoming stranded.
Additionally, mass air flow circuit-related issues often lead to poor combustion efficiency, thereby causing a noticeable decrease in fuel economy.
How to Diagnose Code P0101
Before any repairs can be made, one must first determine the root cause of their vehicle’s P0101 trouble code. This can be accomplished with the use of the following diagnostic steps.
Step 1 – Check For Additional DTCs
Before beginning the diagnostic process, it is important to check for the presence of additional DTCs with and OBD2 code reader.
If additional codes are present, it is imperative to diagnose each code in order of manufacturer specified priority.
Step 2 – Inspect MAF Sensor Wiring and Connector
You will now begin the diagnostic process by carefully inspecting the wires associated with your vehicle’s MAF sensor. Ensure that no burnt, bare, or broken wires exist.
Additionally, check to ensure that all wire terminals are secured within their respective connectors.
Step 3 – Check For Intake Tract Leaks
Thoroughly assess the integrity of your vehicle’s air intake tract tubing, as it runs from the air filter to its conclusion at the engine’s throttle body. This tubing should be free of cracks, splits, and punctures.
Step 4 – Inspect MAF Sensor
If no cause of your vehicle’s P0101 code has been located to this point, remove all necessary intake ducting to gain access to the MAF sensor itself. Inspect this sensor for obvious signs of damage or debris fouling.
Step 5 – Inspect For Vacuum Leaks
In the absence of a firm diagnosis, it will now be necessary to check for the presence of vacuum leaks. This can either be done with the use of a smoke machine while a vehicle is not running, or alternatively, with a handheld propane torch at idle.
An unlit torch can be used to fog any intake related components or junctions with propane. A change in engine idle will signal the location of a leak.
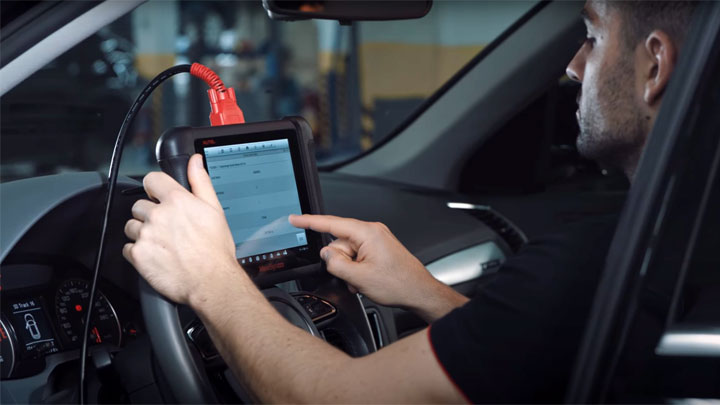
Step 6 – Stream Data
If the root cause of your vehicle’s P0101 code has yet to be discovered, a scan tool can be used to monitor live streaming data from your engine’s management system.
Doing so will allow you to record MAF sensor data, as well as data pertaining to various other sensors. This data can then be compared to specified values provided by factory service literature.
Step 7 – Test MAF Sensor
If all prior steps have failed to provide a satisfactory diagnosis, your vehicle’s MAF sensor is likely suspect.
However, before condemning the MAF sensor, appropriate testing should be conducted as specified by manufacturer-specific service procedures.
How to Fix Code P0101 Code
Once a thorough diagnosis has been made, the following steps can be used to repair the root cause of your vehicle’s P0101 code.
Step 1 – Repair Wiring Damage
If damaged wiring or connectors were noted during the diagnostic process, make any repairs as necessary.
Step 2 – Replace Damaged Intake Ducting
If cracks or splits in your vehicle’s intake ducting became evident during the diagnostic process, replace such components with OEM-grade parts.
Step 3 – Clean MAF Sensor
If no wiring or intake duct-related issues were found, proceed by cleaning your vehicle’s MAF sensor with the appropriate solution. If your vehicle features a hot wire-style MAF sensor, ensure that no cleaner-to-hot wire contact occurs.
Step 4 – Repair All Vacuum Leaks
All vacuum leaks that were located during the diagnostic process should be repaired, including those which pertain to intake gasket and throttle body gasket failures.
Step 5 – Replace MAF Sensor
In the event that prior testing indicated a faulty mass air flow sensor, replacement should be made with an appropriate OEM-grade equivalent sensor.

- Car Temperature Gauge Stopped Working? (Here’s Why) - Apr 15, 2024
- Ignition Coil vs Coil Pack (What’s the Difference?) - Apr 8, 2024
- Windshield Wipers Won’t Turn Off? (Causes and What to Do) - Apr 5, 2024