P0139 Code (Symptoms, Causes, and How to Fix)
Oxygen sensors are key for performance and emissions, but can (and will) fail over time. Code P0139 indicates an issue with one of your vehicle’s O2 sensors.
Let’s go over the common causes of a P0139 code, how serious it really is, and show you the diagnostic steps to take to confirm sensor failure.
What Does Code P0139 Mean?
Diagnostic fault code P0139 indicates that a vehicle’s bank 1/ sensor 2 oxygen sensor has failed to respond in a timely manner, during periods of reduced fueling or fueling cutoff.
This code, as a general rule, relates to a vehicle’s bank 1, post-catalyst O2 sensor. This, in turn, suggests that this particular sensor is incapable of detecting fluctuations in exhaust oxygen content, to the extent for which it was designed.
A vehicle’s O2 sensors are engineered to sustain preset response rates. When these rates are not met, feedback inaccuracies arise, and a corresponding fault code is logged.
In the case of DTC P0139, an engine’s PCM/ECM has determined that the affected 02 sensor has not registered a satisfactory voltage drop (.02V-.03V) within a defined period of time following fuel reduction/cutout. Due to the nature of this code, DTC P0139 is most often logged during deceleration.
While a code of this nature might be an isolated fluke, recurrence or general failure to self-clear this fault would indicate an ongoing issue. As such, proper diagnostics are required to determine the exact source of this fault before any viable repairs can be made.
While it might be tempting to assume that the oxygen sensor itself is at fault, this is not always the case.
See Also: P0036 Code, P0037 Code, P0136 Code, P0137 Code, P0138 Code, P2270 Code
Symptoms of Code P0139

Diagnostic fault code P0139 is often accompanied by a number of secondary symptoms, some of which tend to be more severe in nature than others. Learning to recognize these symptoms can be key when attempting to remedy the issue at hand.
The following are the most common symptoms associated with DTC P0139.
- Illuminated check engine light
- Rough idle after coming to a stop
- Stalling at traffic lights or stop signs
- Hesitation under resumed throttle application
Causes of Code P0139
Diagnostic fault code P0139 can be caused by one of several different underlying conditions, a number of which can be relatively difficult to isolate. Understanding the potential causes of this DTC can prevent unnecessary hassle when attempting to form a diagnosis.
The following are several of the most common causes of DTC P0139.
- Faulty O2 sensor
- Damage to the O2 sensor circuit
- Upstream exhaust leak
- Leaking fuel injectors
- Clogged catalyst
Is Code P0139 Serious?
While the presence of an active P0139 fault code itself is not overly alarming, one potential cause of this DTC can be. At times, DTC P0139 can be set by the presence of excess fuel in an engine’s exhaust, especially during periods of deceleration. This raw, unburnt fuel can do significant damage to a vehicle’s catalytic converter in relatively short order.
On the other hand, diagnostic fault code P0139 can simply come as the result of a compromised O2 sensor, which in itself, is not extremely concerning. However, there is little way to discern between the condition, and that which is described above, without thorough diagnostics. For this reason, DTC P0139 should be taken seriously, out of an abundance of caution.
In any event, the root cause of diagnostic fault code P0139 should be thoroughly diagnosed and repaired as soon as possible. As mentioned, doing so can quite possibly save you from incurring more expensive repairs in the near future.
If you do not feel comfortable tackling such repairs on your own, or simply do not have enough time, an appointment with a trusted service center should be scheduled at the first available opportunity.
How to Fix Code P0139
The following steps can be followed to assist in diagnosing your vehicle’s P0139 fault code. As always, be sure to consult factory-specific service literature for your particular model of vehicle before attempting any such repairs.
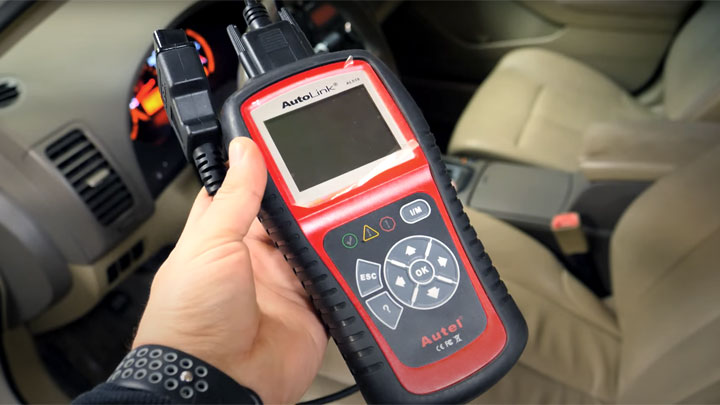
#1 – Check For Additional DTCs
Before beginning the diagnostic process, carefully check for the presence of additional diagnostic trouble codes. Any such codes should be thoroughly diagnosed before proceeding.
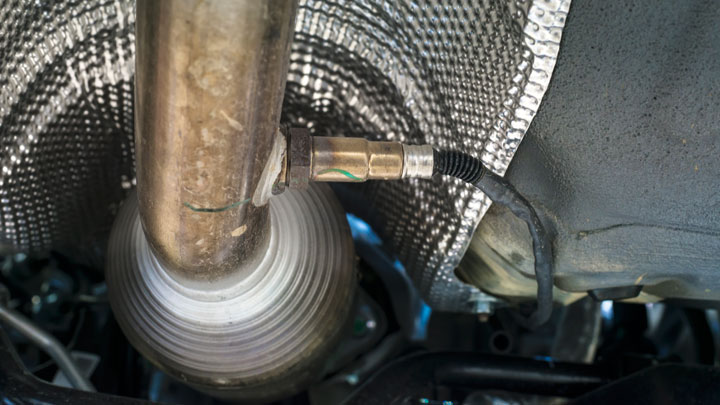
#2 – Inspect O2 Sensor
Begin the diagnostic process by performing a careful visual inspection of the affected bank 1 / sensor 2 oxygen sensor. Check for any signs of damage, and replace as necessary. Additionally, all related wiring should be checked for visual defects.
#3 – Check For Exhaust Leaks
With the use of an application-specific smoke machine, check for the presence of any exhaust leaks upstream of the affected O2 sensor. Any leaks that are uncovered should be repaired before proceeding.
#4 – Check For Leaking Fuel Injectors
Next, you will need to ensure that none of your engine’s injectors are bypassing fuel. This is typically done by monitoring fuel rail pressure bleed-off, or by removing each injector and checking for leaks.
#5 – Verify Sensor Inputs/Outputs
You will now ensure that the affected sensor is receiving all proper inputs (power/ground) with the use of a digital multimeter. The sensor’s signal voltage should then be checked, while an assistant revs, and releases the engine’s throttle.
A lack of noticeable response would be indicative of sensor failure.

- P0480 Code (Symptoms, Causes, and How to Fix) - Apr 19, 2024
- Car Temperature Gauge Stopped Working? (Here’s Why) - Apr 15, 2024
- Ignition Coil vs Coil Pack (What’s the Difference?) - Apr 8, 2024