P0160 Code (Symptoms, Causes, and How to Fix)
Oxygen sensors measure exhaust gases, enabling precise fuel delivery for efficiency. But O2 sensors fail over time, setting diagnostic trouble codes like P0160.
Fortunately, it won’t prevent you from driving but it should still be resolved. Keep reading to learn what specifically causes a P0160 code, the symptoms to expect, and how to fix it.
What Does Code P0160 Mean?
Today’s vehicles feature both pre-catalyst and post-catalyst oxygen sensors for each respective cylinder bank. Feedback provided from these two sensors is compared by a vehicle’s ECM/PCM in order to determine overall catalyst efficiency.
While a pre-catalyst O2 sensor generally cycles on an evergoing basis between lean/rich readings, post-catalyst O2 sensors react at a somewhat slower rate.
In rare cases, a sensor of this type might not react at all, leading to a high probability of a “stuck” sensor. A vehicle’s computer is privy to the fact that this sensor is not operating as expected, and reacts accordingly.
Whether a bank 2, position 2 oxygen sensor actually sticks, or just simply quits relaying information, diagnostic trouble code P0160 will almost certainly be stored. This code might be stored by itself, or can also be stored in the accompaniment of additional diagnostic trouble codes.
Symptoms of Code P0160
Diagnostic trouble code P0160 is often accompanied by a number of secondary symptoms, some of which tend to be more severe than others. Learning to recognize these various symptoms can prove beneficial when attempting to remedy such issues in a timely manner.
The following are several of the most common symptoms associated with DTC P0160.
- Illuminated check engine light
- Hesitation upon acceleration
- Erratic idle
- Reduced fuel economy
Causes of Code P0160
Diagnostic trouble code P0160 can be caused by a number of potential underlying issues, some of which often prove more difficult to pinpoint than the rest. Nonetheless, understanding the potential causes of DTC P0160 can be of benefit when trying to jumpstart the diagnostic process as a whole.
The following are several of the most common causes of DTC P0160.
- Faulty oxygen sensor (bank 2, position 2)
- Holes within vehicle exhaust
- Wiring faults within bank 2, position 2, oxygen sensor circuit
- Compromised ECM/PCM
Is Code P0160 Serious?
While the presence of an active P0160 diagnostic trouble code will seldom prevent a vehicle from operating, it can prevent a vehicle’s engine from operating at peak efficiency. This stems from the fact that a vehicle’s ECM/PCM is receiving what it determines is skewed, incomplete, or non-existent data, thereby preventing critical operational inputs from being obtained.
As a result, engine operating efficiency is negatively impacted, thereby causing a host of additional issues. Not only will a vehicle’s check engine light be illuminated, but a somewhat erratic idle can also be expected. A certain degree of hesitancy might also be noted during periods of increased throttle demand.
In any event, the root cause of a vehicle’s P0160 diagnostic fault code should be diagnosed and remedied at the first available opportunity. This mitigates any opportunity for secondary issues to arise while keeping related symptoms to a bare minimum.
If you do not feel comfortable tackling such repairs yourself, an appointment should be made with a trusted automotive service center as soon as possible.
How to Fix Code P0160
The following steps can be followed to assist in diagnosing and repairing the root cause of a vehicle’s active P0160 diagnostic trouble code. As always consult a factory-specific service manual for your particular make and model of vehicle, before attempting any such repairs.
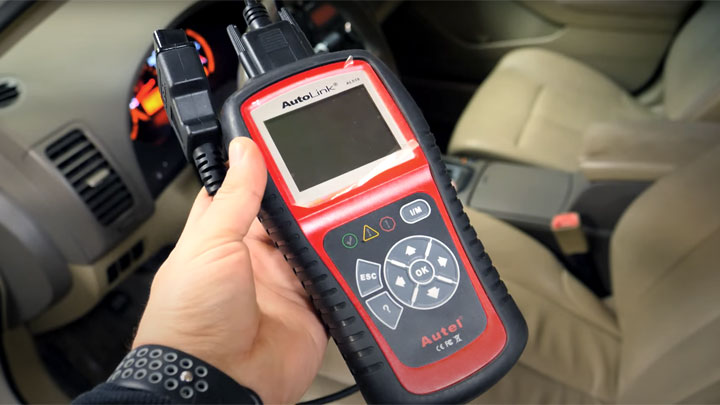
#1 – Check For Additional DTCs
Before beginning the diagnostic process, check for the presence of additional diagnostic trouble codes. Any additional DTCs should be thoroughly diagnosed prior to continuing on to the next step.
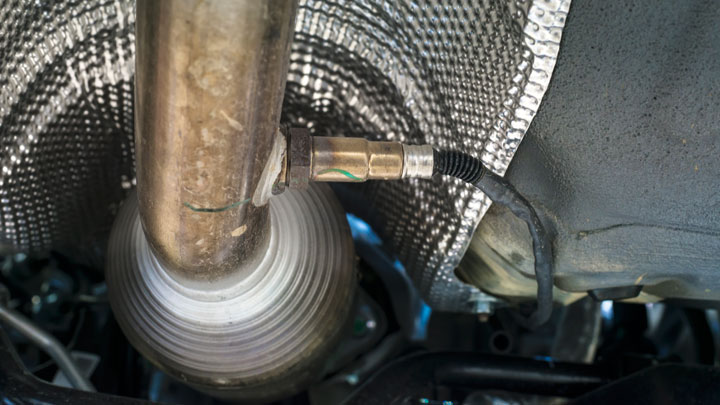
#2 – Perform Visual Inspection
Begin by carefully inspecting your vehicle’s bank 2, position 2 oxygen sensor for obvious signs of damage. Carefully check the sensor’s structural integrity, while also inspecting for any number of wiring related defects.
If sensor irregularities are noted, replace the offending sensor. If wiring defects are noted, make all necessary repairs.
#3 – Check Sensor Resistance
Using a quality multimeter, check for resistance across the offending sensor. This resistance rating should be compared to that specified by a vehicle’s manufacturer. If this reading falls outside of specification, the affected sensor should be slated for replacement.
#4 – Verify Input Delivery
Again, using a quality multimeter, check for the presence of proper input feeds to the bank 2, position 2 oxygen sensor. This sensor should be of a four-wire configuration and should receive a reference (+) feed, a circuit ground feed, a heater 12V (+) feed, and a heater ground feed.
Assuming all inputs are present, yet a lack of O2 sensor operation is still detected, sensor replacement will be required.
#5 – Determine Source of Input Loss
If one or more of the above-mentioned inputs are not present, the point of input loss must be determined. This will involve checking for these same inputs at the opposing end of the affected circuit.
If all inputs are present at the ECM/PCM, yet not at the 02 sensor itself, then an opening within this circuit is likely. On the other hand, a lack of input feed at the opposing end of this circuit would cast doubt upon the ECM/PCM itself.

- P0480 Code (Symptoms, Causes, and How to Fix) - Apr 19, 2024
- Car Temperature Gauge Stopped Working? (Here’s Why) - Apr 15, 2024
- Ignition Coil vs Coil Pack (What’s the Difference?) - Apr 8, 2024
P060 could it be the evap container