P0327 Code (Symptoms, Causes, and How to Fix)
Even reliable cars and trucks can unexpectedly break down, leaving drivers questioning the cause. But 1996+ models provide diagnostic trouble codes, decoding mechanical mysteries.
In the case of a P0327 code, you have an issue with a knock sensor. Read on to learn what triggers DTC P0327 in your Chevy, Toyota or other vehicle, and how to fix this issue the right way.

What Does Code P0327 Mean?
Diagnostic trouble code P0327 refers to a low voltage condition within a vehicle’s knock sensor circuit. More specifically, this code is in reference to an engine’s bank #1 knock sensor, on engines of a “V” configuration.
However, to better understand the gravity of DTC P0327, one must first familiarize themselves with the theory behind knock sensor operation.
Most modern vehicles feature what is referred to as a “knock” sensor. Sensors of this type monitor the harmonics of an engine, in an attempt to recognize and isolate any irregularities.
When functioning properly, an engine’s knock sensor alerts a motorist of abnormal engine vibrations, by illuminating a vehicle’s check engine light. Most knock sensor “events” stem from marginalized combustion.
In the case of DTC P0327, an engine’s management software is led to believe that the sensor in question is incapable of providing accurate feedback. This, in turn, negates a vehicle’s ability to determine between normal and abnormal engine vibrations, thereby leaving it somewhat more vulnerable to subsequent wear and tear.
Related: Code P0325, Code P0326, Code P0328, Code P0332
Symptoms of Code P0327

Diagnostic trouble code P0327 is often accompanied by a number of additional symptoms, the bulk of which vary in severity. Recognizing these symptoms often proves valuable when attempting to pinpoint the underlying cause of such issues.
The following are several of the most common symptoms associated with DTC P0327.
- Check engine light
- Fluctuation in RPM
- Engine misfire
- Hesitation under load
- Reduced performance
Additionally, there are certain instances where diagnostic trouble code P0327 is not accompanied by any additional symptoms, though this is quite rare.
What Can Cause a P0327 Code?

Diagnostic trouble code P0327 can be caused by a host of underlying issues, some of which tend to be far more common than others. Understanding these potential causes can assist you in repairing your vehicle in an expedited fashion.
The following are several of the most common causes of DTC P0327.
- Faulty knock sensor
- Knock sensor circuit wiring issues
- EGR-related defects
- Cooling system problems
- Compromised PCM/ECM
Is Code P0327 Serious?
When compared to other fault codes, DTC P0327 is often viewed as being of moderate priority. In general, there is little risk of additional damage occurring, as the result of driving with an active P0327 fault code.
This stems from the fact that this code is not as indicative of operational related issues, as it is a sensor-specific failure. Simply put, code P0327 details a relative inability of a vehicle’s knock sensor to function as intended.
Likewise, the feedback provided by a vehicle’s knock sensor has little to do with further ECM/PCM calculation, meaning that such data is not critical to efficient engine operation. A lack of proper knock sensor operation is unlikely to prevent a vehicle from running to a suitable degree of efficiency.
Nonetheless, one should take the necessary time to diagnose and repair the root cause of their vehicle’s P0327 fault code, whenever it is practical to do so. Making such repairs re-establishes knock sensor operations, thereby eliminating your vehicle’s pesky check engine light in the process.
How to Fix Code P0327

The following steps can be used to assist in diagnosing and repairing the root cause of your vehicle’s active P0327 diagnostic fault code. As always, be sure to consult a factory-specific service manual (printed or online) for your particular vehicle, before proceeding with any such repairs.
#1 – Check For Additional Trouble Codes
Before beginning the diagnostic process, check for the presence of additional diagnostic fault codes. Any such codes that are present should be thoroughly diagnosed before proceeding.
#2 – Inspect Knock Sensor Wiring
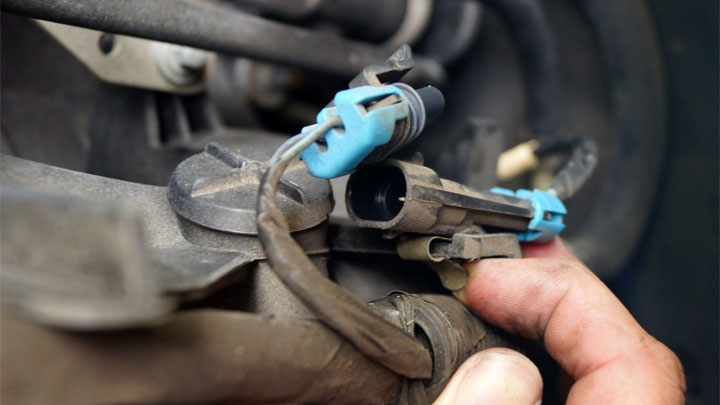
Begin by inspecting the affected knock sensor, as well as any corresponding wiring. While conducting such an inspection, it is also wise to check the integrity of the sensor’s corresponding connector. Any damage or irregularities should be corrected immediately.
#3 – Check Power/Ground
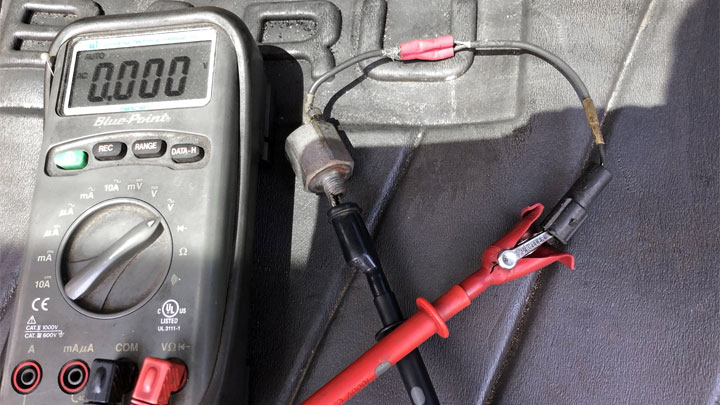
Next, check for the presence of power and ground inputs (as specified by the vehicle’s manufacturer) at the affected knock sensor, with the use of a quality digital multimeter. If either feed is absent, further troubleshooting of the input circuits will be required.
#4 – Test Resistance
You can now remove the knock sensor in question, and test its effective resistance. Most manufacturers specify that sensors of this design should feature resistance in excess of .5 ohms. Anything less than this degree of resistance will necessitate sensor replacement.
#5 – Check Sensor Feedback
Assuming that the resistance of your vehicle’s knock sensor is within specification, an oscilloscope will be needed to read and decipher feedback from the sensor itself.
Any and all feedback should reflect manufacturing specifications, not to deviate from the outline wave shape or duration. If no abnormalities in this feedback are uncovered, a faulty or failing PCM/ECM is likely.
- P0480 Code (Symptoms, Causes, and How to Fix) - Apr 19, 2024
- Car Temperature Gauge Stopped Working? (Here’s Why) - Apr 15, 2024
- Ignition Coil vs Coil Pack (What’s the Difference?) - Apr 8, 2024
