P0051 Code (Symptoms, Causes, and How to Fix)
The dreaded check engine light can cause anxiety, but sometimes it’s just a friendly reminder for minor maintenance. Diagnostic code P0051 is one such case – illumination simply indicates a sensor-monitored parameter fell outside normal range.
While you want to address it, a P0051 code doesn’t necessitate panic or big repairs. Read on to learn about a P0051 code, what caused it, and how to properly fix it.
What Does Code P0051 Mean?
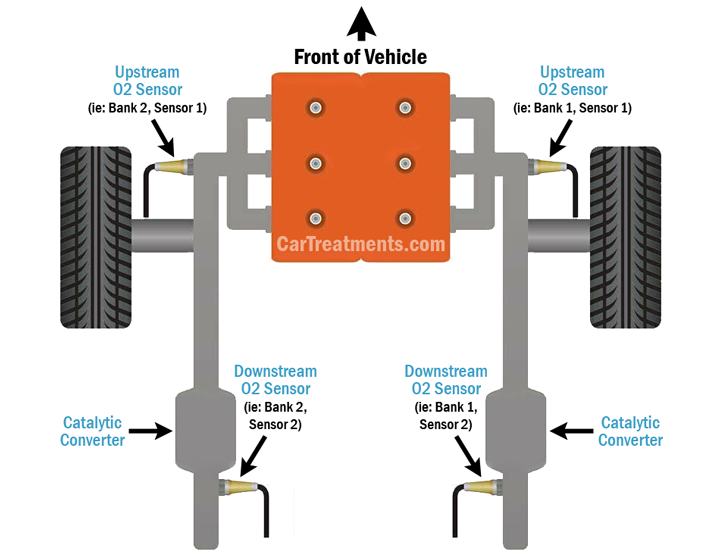
Diagnostic fault code P0051 is indicative of a low voltage condition within the heater control circuit of a vehicle’s bank 2, position 1 oxygen sensor. Simply put, the affected oxygen sensor heater is not responding as anticipated, and the presence of adequate input voltage can not be confirmed.
To better understand this principle, you should first familiarize yourself with the manner in which a heated O2 sensor operates. Most late-model vehicles now come equipped with heated oxygen sensors, which quickly warm the associated sensor probe to temperature. This allows more accurate oxygen sensor readings to be taken and recorded.
In the event of DTC P0051, a vehicle’s ECM has determined that its corresponding bank 2, position 1 oxygen sensor heating element is inoperable.
See Also: Code Poo30, Code P0031, Code P0032, Code P0036, Code P0037, Code P0050
Symptoms of Code P0051
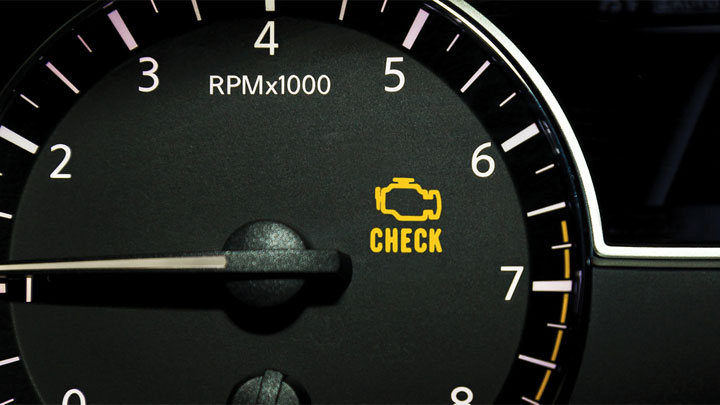
Unlike many fault codes, motorists are unlikely to notice any secondary symptoms that accompany DTC P0051 besides a Check Engine light.
This stems from the fact that this fault is simply alerting you to a general lack of satisfactory voltage in the vehicle’s bank 2, position 1 oxygen sensor.
In the most extreme of cases, one might notice that their vehicle runs slightly rougher than normal during the first few minutes after startup, or that a vehicle’s fuel economy is slightly reduced.
Causes of Code P0051
Diagnostic fault code P0051 can be caused by one of several different root causes, some of which can be more difficult to pinpoint than others. Those who are familiar with these potential causes are often quite adept at expediting the repair process as a whole.
The following are several of the most common causes of DTC P0051.
- Faulty oxygen sensor
- Compromised oxygen sensor wiring
- Damaged oxygen sensor wiring connector
- Blown oxygen sensor heater fuse
- Faulty PCM/ECM
Is Code P0051 Serious?
In the general scheme of all things automotive, diagnostic fault code P0051 is not as serious as many other faults that could possibly be accrued. This fault is unlikely to be accompanied by any driveability-related symptoms, or cause further issues, as long as it is addressed in a timely manner.
In this case, your vehicle is simply attempting to tell you that the affected O2 sensor will be incapable of operating as efficiently as it otherwise would.
Nonetheless, the root cause of this diagnostic fault code, like that of any other, should be thoroughly diagnosed and repaired as soon as the chance arises. Doing so will ensure that your vehicle continues to operate at maximum efficiency and in the most emissions compliant manner possible.
If making repairs yourself seems daunting or you’d just prefer to let the experts handle it, you should schedule a visit to a reliable repair shop right away.
How to Fix Code P0051
The steps below can be followed to assist you in diagnosing and repairing the root cause of your vehicle’s P0051 diagnostic fault code. As always, factory-specific service literature for your particular model of the vehicle should be consulted before attempting any such repairs.
#1 – Check For Additional Trouble Codes
Before beginning the diagnostic process, you should check for the presence of additional fault codes with the use of a OBD2 scan tool. Any such codes that are found should be thoroughly diagnosed before proceeding.
#2 – Perform Visual Inspection of O2 Sensor
Begin by carefully inspecting your vehicle’s bank 2, position 1 O2 sensor for obvious signs of damage. Likewise, verify that all related wiring is intact, and free of similar defects. Any recorded damage should be repaired in its entirety.
#3 – Check the Integrity of O2 Sensor Connector
Next, disconnect and inspect the connector associated with your vehicle’s bank 2 position 1 oxygen sensor. Pay careful attention to any abnormal condition that might lead to excess circuit resistance and voltage drop, such as damaged connector pins and/or corrosion.
Any such conditions should be corrected before proceeding.
#4 – Verify 12-Volt Supply
With the use of a digital multimeter, check for the presence of a 12-volt power feed at the harness side of the connector to the affected O2 sensor. A lack of proper feed voltage would indicate a blown heater circuit fuse or a lack of continuity in the corresponding circuit.
#5 – Verify Presence of Ground
Next, it is important to verify that you have a suitable ground present at the harness side of your vehicle’s O2 sensor connector. If this is not the case, further inspection of the affected circuit will be required.
#6 – Measure Resistance of Heater Circuit
It will now be necessary to check the resistance across the affected O2 sensor’s heater circuit. These readings should be compared to the applicable range specified by your vehicle’s manufacturer.
Readings outside of this specified range would ultimately necessitate replacement of the O2 sensor in question.

- P0480 Code (Symptoms, Causes, and How to Fix) - Apr 19, 2024
- Car Temperature Gauge Stopped Working? (Here’s Why) - Apr 15, 2024
- Ignition Coil vs Coil Pack (What’s the Difference?) - Apr 8, 2024